1 Day Workshop (Full Stack Development)

I am a developer from India....
⭐ 1. Overview of Web Development
📌 What is Web Development?
Web Development is the process of creating websites or web applications for the internet. It involves designing the structure, appearance, and interactivity of a website.
🔹 Types of Web Development
Frontend: Focuses on the user-facing side of websites using HTML, CSS, and JavaScript along with modern frameworks like React, Angular, or Vue.
Backend: Handles server-side logic, databases, and APIs using technologies such as Node.js, Express, Python, or PHP.
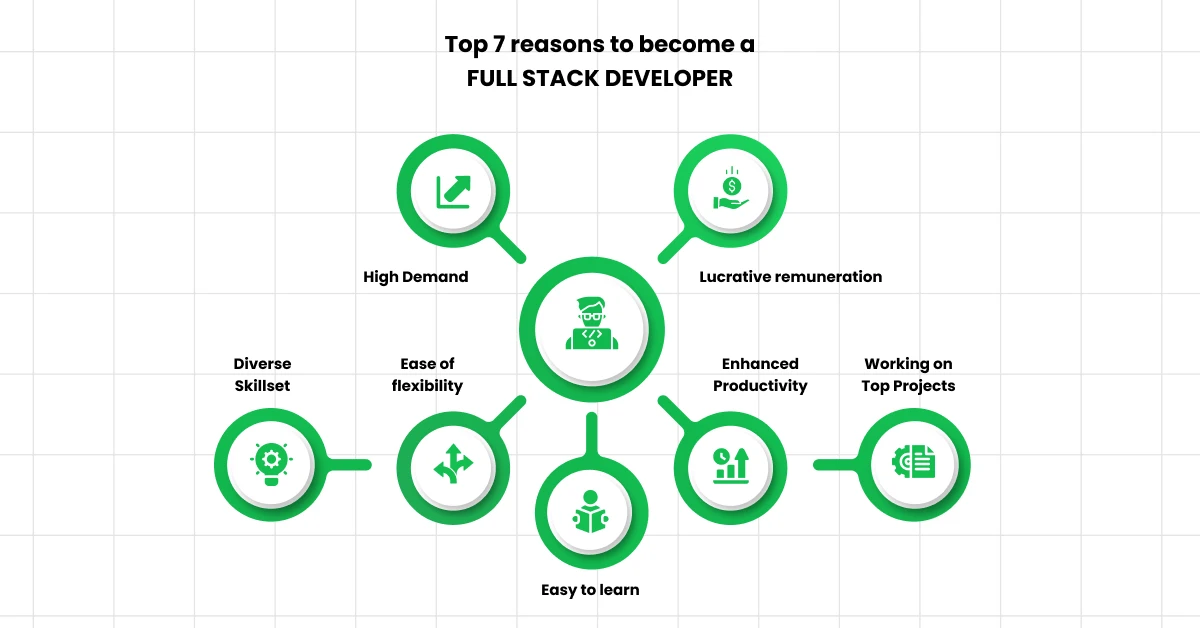
Full Stack: A combination of both frontend and backend. Popular stacks include the MERN Stack (MongoDB, Express, React, Node.js) for building complete, dynamic applications.
📌 Key Skills & Features of a Web Developer
Strong knowledge of HTML, CSS, and JavaScript
Hands-on experience with React (frontend) and Node.js + Express (backend)
Ability to work with databases like MongoDB
Debugging and problem-solving mindset
Proficiency in browser developer tools
Familiarity with version control systems (Git & GitHub)
Understanding of responsive design and modern UI frameworks (e.g., Bootstrap, Tailwind CSS)
1. Choose a Technology
In the full stack developer roadmap, the first thing you have to do is to choose a technology stack. There are a lot of technological stacks out there that help you get hands-on experience in full stack development.
Choosing the right technology stack is the first important step in your journey to becoming a full stack developer.
Two popular options are the MERN and MEAN stacks, both of which are based on JavaScript, making it easier for developers to handle both client-side and server-side programming with a single language.
a) MERN Stack:
The MERN stack is favored for its performance, scalability, and the streamlined development process it offers, particularly for developers looking to create responsive web applications.
b) MEAN Stack:
Similar to MERN, it is designed for developing highly interactive and dynamic web applications. The MEAN stack is advantageous for developers seeking an all-encompassing framework that facilitates both the development and testing of applications within a single cohesive ecosystem.

One thing to understand is that both MEAN and MERN are full-stack frameworks. They both incorporate Java-coded components. The principal difference is that MEAN adopts Angular JS whereas MERN implements React JS. Developers can use either of these stacks to create a reactive and intuitive User Interface.
Source -Google

Comparison Points
`1. MERN stack is ideal for the faster and more rapid development of smaller applications. When compared to the MEAN stack which is excellent for large-scale applications.
2. In the long run, it has been found that React does a better job than Angular, simply because it is extensively used, constantly evolves and remains relevant. It is also one step ahead of Angular because of its virtual DOM Manuplations , as well as rendering optimizations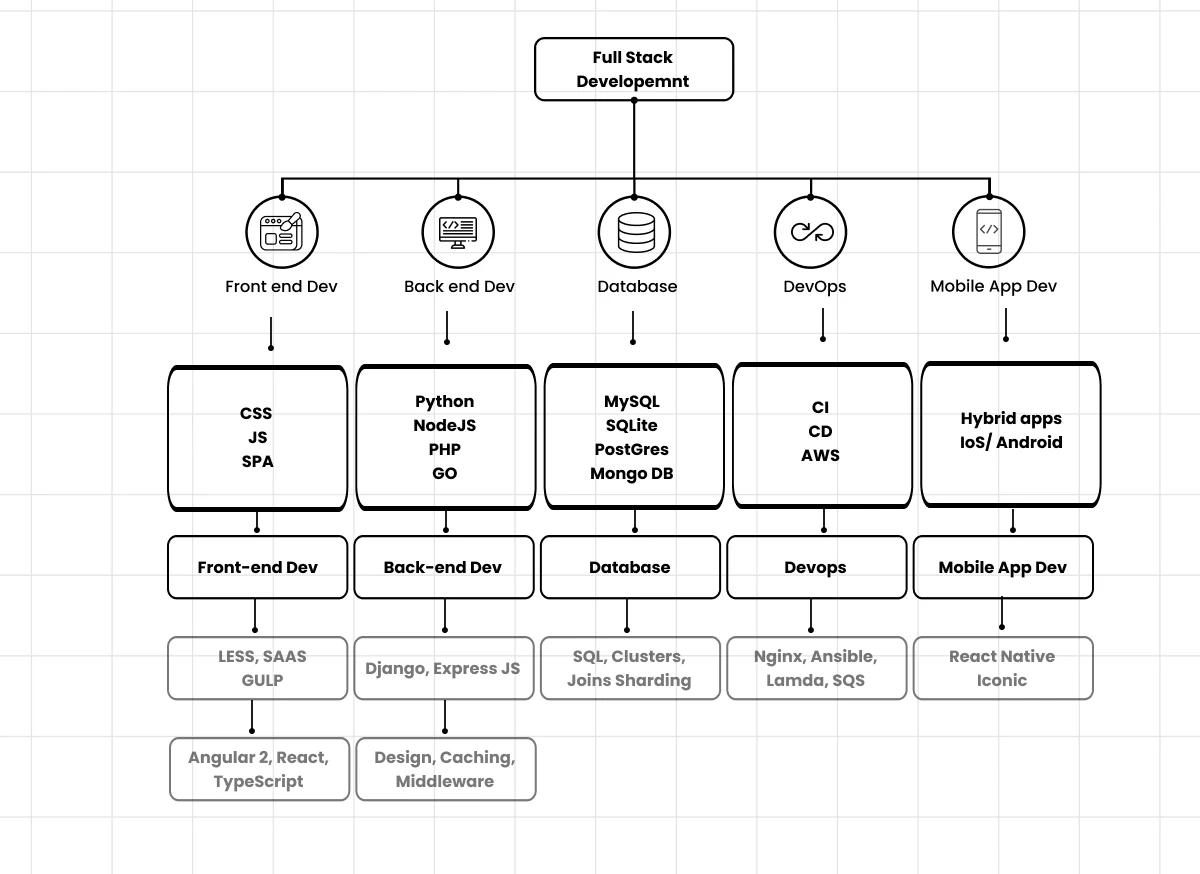
Frontend
1. Introduction to Frontend Development
Frontend development is a pivotal part of web development, focused on creating the client-facing side of applications, ensuring that users interact seamlessly with the web interface. It involves the use of key technologies like HTML, CSS, and JavaScript, each of which plays a crucial role in building responsive, accessible, and dynamic user interfaces.

HTML5: Provides the semantic structure of the webpage. HTML5 introduced new elements such as <article>, <section>, <footer>, and more, allowing for a well-organized DOM tree and improving the website’s SEO and accessibility. Features like the <canvas> element allow for dynamic, scriptable rendering of 2D shapes and images.
CSS3: Handles the layout, colors, fonts, and responsiveness of web pages. Modern layout mechanisms like CSS Grid and Flexbox provide powerful tools for creating complex layouts with minimal code. CSS3 also introduced animations and transitions, enabling developers to create interactive elements without relying on JavaScript.
JavaScript (ES6+): JavaScript adds the logic and interactivity needed for dynamic websites. ES6 (ECMAScript 2015) brought essential features like Arrow Functions, Destructuring, and Template Literals, which simplify code and improve readability. Advanced concepts like Closures, Promises, and Async/Await make it easier to manage asynchronous operations, crucial for fetching data from APIs and creating SPAs (Single Page Applications).
Responsibilities: -

Specialized Frontend Roles
With advancements in frontend technologies, various specialized roles have emerged. Frontend development is no longer limited to basic web page creation; it involves developing complex, interactive web application.

Core Frontend Skills
The role of a frontend developer requires a deep understanding of the following skills and technologies.

Tools & Technologies in Frontend Development
Frontend developers utilize a broad array of tools and frameworks to enhance productivity, optimize performance, and maintain code quality.

Category
Examples
Version Control
Git, GitHub, GitLab for code versioning, branching, merging, and collaborative workflows.
Build Tools
Webpack, Parcel, Vite for bundling assets (CSS, JavaScript) and optimizing application load times.
Preprocessors
SASS, LESS to add variables, mixins, and modularize CSS for maintainability and scalability.
Task Runners
Gulp, Grunt for automating repetitive tasks like image compression, CSS minification, and file watching.
JavaScript Frameworks
React.js, Vue.js, Angular for building dynamic, scalable applications with reusable UI components.
Testing & Debugging
Jest, Mocha, Cypress for unit and integration testing; Chrome DevTools for debugging and performance profiling.
API Interaction
Axios, Fetch API, GraphQL for interacting with backend services and handling data asynchronously.
What is HTML5?
HTML5 is the newest version of HTML. The term refers to two things. One is the updated HTML language itself, which has new elements and attributes. The second is the larger set of technologies that work with this new version of HTML — like a new video format — and enable you to build more complex and powerful websites and apps.
To understand how HTML has evolved over the years, let’s look at the differences between HTML and HTML5.
📊 HTML vs HTML5 – Comparison

⚡ In short:
HTML4 = static + dependent on plugins
HTML5 = dynamic, multimedia-rich, mobile-friendly, plugin-free📌 Key Features of HTML5:
Semantic Elements →
<header>,<footer>,<article>,<section>(improve readability + SEO).Multimedia Support →
<audio>,<video>tags (no need for Flash).Graphics & Animation →
<canvas>for 2D drawings, SVG for scalable graphics.Forms 2.0 → new input types like
email,date,number,range.APIs → LocalStorage, Geolocation, Web Workers, Offline Web Apps.
Cross-device support → works on mobile, tablets, and desktops smoothly.
🔹 Example Code Snippets
✅ 1. Semantic Structure
    <!DOCTYPE html>
    <html lang="en">
    <head>
      <meta charset="UTF-8">
      <title>HTML5 Example</title>
    </head>
    <body>
      <header>
        <h1>Welcome to IIT Guwahati Workshop 🚀</h1>
      </header>

      <section>
        <article>
          <h2>About HTML5</h2>
          <p>HTML5 introduces modern elements and APIs for building powerful web apps.</p>
        </article>
      </section>

      <footer>
        <p>Made with ❤️ in HTML5</p>
      </footer>
    </body>
    </html>
✅ 2. Multimedia
    <video controls width="320">
      <source src="sample.mp4" type="video/mp4">
      Your browser does not support video.
    </video>

    <audio controls>
      <source src="audio.mp3" type="audio/mpeg">
      Your browser does not support audio.
    </audio>
✅ 3. Canvas Drawing
    <canvas id="myCanvas" width="200" height="200" style="border:1px solid black;"></canvas>
    <script>
      const c = document.getElementById("myCanvas");
      const ctx = c.getContext("2d");
      ctx.fillStyle = "blue";
      ctx.fillRect(50, 50, 100, 100);
    </script>
✅ 4. Graphics
    <canvas id="draw" width="200" height="100"></canvas>
    <script>
      const c = document.getElementById("draw").getContext("2d");
      c.fillStyle = "blue";
      c.fillRect(20,20,150,50);
    </script>
✅ 5. Storage (instead of cookies)
    // Local Storage
    localStorage.setItem("name", "Keshav");
    alert(localStorage.getItem("name"));
🔹 Why HTML5 Matters?
👉 Removes dependency on plugins.
👉 Mobile-friendly + SEO-friendly.
👉 Backbone of modern web apps like YouTube, Gmail, etc.
👉 Client-side storage APIs
Here are 50 Coding Templates Of Html, css , Js You Must Watch It - Link 🔗
**
CSS3 Overview**
📌 What is CSS3?
CSS3 is the latest version of CSS, used to style HTML elements with colors, layouts, fonts, and animations. It introduced new features and modules that were not in CSS2, making web pages more dynamic and responsive.
🔹 Major Differences: CSS vs CSS3
| Feature | CSS | CSS3 |
| Modules | Single specification | Modular (Selectors, Box, Backgrounds, Fonts, Transitions, Animations, Flexbox, Grid, etc.) |
| Selectors | Basic (element, class, ID) | Advanced: :nth-child(), :not(), :last-child, attribute selectors |
| Colors | Named colors, hex, rgb | RGBA, HSL, HSLA, gradients |
| Borders | Basic borders | Rounded corners (border-radius), box shadows |
| Backgrounds | Solid or image | Multiple backgrounds, gradients |
| Text | Basic font styles | Text shadows, web fonts (@font-face), word-wrap |
| Animations | Not available | @keyframes, transitions, transforms |
| Layout | Float, inline-block | Flexbox, Grid, Media Queries (responsive design) |
| Browser Compatibility | Good, older browsers | Requires modern browsers for advanced features |
🔹 CSS3
🔹 1. Syntax
    selector {
      property: value;
    }
🔹 2. Selectors +Specificity
    /* Basic */
    p { color: blue; }

    /* Class */
    .container { padding: 20px; }

    /* ID */
    #main { font-size: 18px; }

    /* Advanced CSS3 */
    li:nth-child(odd) { background: #f2f2f2; }
    a:hover { color: red; }
🔹 3. Box Model
    div {
      width: 200px;
      padding: 20px;
      border: 5px solid black;
      margin: 15px;
    }
🔹 4. Backgrounds
    /* Gradient */
    body {
      background: linear-gradient(to right, #ff7e5f, #feb47b);
    }

    /* Multiple images */
    div {
      background: url(img1.png), url(img2.png);
    }
🔹 5. Borders & Shadows
    .box {
      border-radius: 10px;
      box-shadow: 2px 2px 10px rgba(0,0,0,0.3);
    }
🔹 6. Fonts & Text
    /* Web Font */
    @font-face {
      font-family: 'MyFont';
      src: url('myfont.woff');
    }

    h1 {
      font-family: 'MyFont', sans-serif;
      text-shadow: 2px 2px 5px gray;
    }
🔹 7. Flexbox (Layout)
    .container {
      display: flex;
      justify-content: space-around;
      align-items: center;
    }
🔹 8. CSS Grid (2D Layout)
    .grid {
      display: grid;
      grid-template-columns: repeat(3, 1fr);
      gap: 10px;
    }
🔹 9. Transitions & Animations
    /* Transition */
    button {
      background: blue;
      transition: background 0.5s ease;
    }
    button:hover {
      background: green;
    }

    /* Animation */
    @keyframes slide {
      0% { transform: translateX(0); }
      100% { transform: translateX(100px); }
    }
    .box {
      animation: slide 2s infinite alternate;
    }
🔹 10. Media Queries (Responsive Design)
    @media (max-width: 768px) {
      body { background-color: lightyellow; }
      .container { flex-direction: column; }
    }
🔹 Why CSS3 Matters?
Modern layouts → Flexbox & Grid
Smooth animations & transitions
Better typography & colors
Responsive design with media queries
Visual effects like shadows, gradients, rounded corners
* Some Concepts of CSS Transitions That You Need To Know
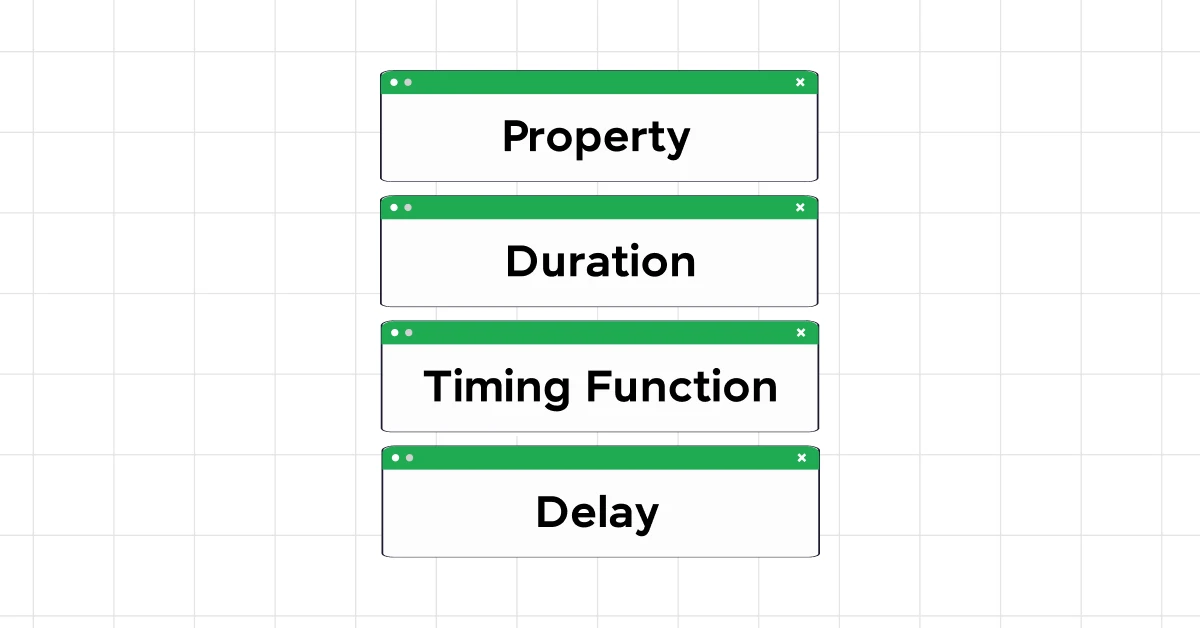
- Property
The CSS property you want to animate.
Examples:
background-color,width,height,transform,opacity.
transition: background-color 0.5s;
- Duration
How long the transition lasts.
Examples:
0.5s(half a second),2s(two seconds).
transition: background-color 2s;
- Timing Function
Defines the speed curve of the transition.
Common values:
linear→ constant speedease→ starts slow, speeds up, ends slow (default)ease-in→ starts slowease-out→ ends slowease-in-out→ starts and ends slow
transition: background-color 0.5s ease-in-out;
- Delay
Wait time before the transition starts.
Examples:
0s(no delay),1s(1 second delay)
transition: background-color 0.5s ease 1s;
Full Example
    <button>Hover Me</button>

    <style>
    button {
      background-color: blue;
      color: white;
      padding: 10px 20px;
      border: none;
      cursor: pointer;
      transition: background-color 0.5s ease-in-out 0.2s;
    }

    button:hover {
      background-color: green;
    }
    </style>
✅ Explanation:
background-color→ property being animated0.5s→ duration of the transitionease-in-out→ speed curve0.2s→ delay before starting
JavaScript (ES6+) Overview

📌 What is ES6+?
ES6 (ECMAScript 2015) introduced modern syntax and features to make JavaScript more readable, modular, and powerful. ES6+ refers to ES6 and newer versions (ES7, ES8…) with continuous improvements.
🔹 Major Differences: JS (ES5) vs JS (ES6+)
| Feature | JavaScript (ES5) | JavaScript (ES6+) |
| Variables | var only (function-scoped) | let & const (block-scoped) |
| Functions | function keyword | Arrow functions () => {} |
| String Templates | Concatenation: "Hello " + name | Template literals: Hello ${name} |
| Objects | Basic syntax | Object destructuring, shorthand properties |
| Arrays | Standard methods | New methods: .map(), .filter(), .reduce(), .find() |
| Modules | Not supported natively | import / export |
| Classes | Prototype-based | class syntax with constructor |
| Default Parameters | Manual checks | function f(a=10) {} |
| Promises / Async | Callback hell | Promise, async/await |
🔹 ES6+
🔹 1. Variables
    var x = 5;        // ES5
    let y = 10;       // ES6+ block-scoped
    const z = 20;     // constant
🔹 2. Arrow Functions
    // ES5
    function add(a,b){ return a+b; }

    // ES6+
    const add = (a,b) => a + b;
🔹 3. Template Literals
    const name = "Keshav";
    console.log(`Hello, ${name}!`); // Hello, Keshav!
🔹 4. Destructuring
    const user = {name: "Keshav", age: 22};
    const {name, age} = user;
    console.log(name, age); // Keshav 22

    const arr = [1,2,3];
    const [a,b] = arr;
    console.log(a,b); // 1 2
🔹 5. Array Methods
.map(), .filter(), .reduce(), .forEach()
    const numbers = [1,2,3,4,5];
    const squared = numbers.map(n => n*n); // [1,4,9,16,25]
    const evens = numbers.filter(n => n%2===0); // [2,4]
    const sum = numbers.reduce((acc, n) => acc+n, 0); // 15
Implementation Logic:
.map()transforms.filter()selects.reduce()accumulates
- 🔹 6. Classes
    class Student {
      constructor(name, grade){
        this.name = name;
        this.grade = grade;
      }
      getDetails(){
        return `${this.name} is in grade ${this.grade}`;
      }
    }
    const s1 = new Student("Riya",10);
    console.log(s1.getDetails());
🔹 7. Modules (ES6+)
    // math.js
    export const add = (a,b) => a+b;

    // main.js
    import { add } from './math.js';
    console.log(add(5,3));
🔹 8. Promises & Async/Await & Fetch API
Asynchronous network requests using fetch()
JSON parsing , Handling HTTP GET
async functions
awaitpauses code until Promise resolves```plaintext // Promise fetch('https://jsonplaceholder.typicode.com/users/1') .then(res => res.json()) .then(data => console.log(data.name));
// Async/Await async function getUser() { try { const res = await fetch('https://jsonplaceholder.typicode.com/users/2'); const user = await res.json(); console.log(user.name); } catch (err) { console.error("Failed to fetch:", err); } }
getUser();
// Fetch Api async function getUser() { try { const res = await fetch('https://jsonplaceholder.typicode.com/users/1'); const user = await res.json(); console.log(user.name); } catch (err) { console.error("Error:", err); } } getUser();
    * `fetch()` sends request and returns a Promise

    * `.json()` converts the response to a JavaScript object

    * Chaining `.then()` handles the result step-by-step
        `async` makes a function return a Promise

    * `await` simplifies `.then()` chaining

    * Easier to read and debug asynchronous code


    ---

    ### 🔹 9. **Closures**

    Function inside function

    ### Inner function retains access to outer function’s variables

    ```plaintext
        function outer() {
          let counter = 0;
          return function inner() {
            counter++;
            console.log(counter);
          };
        }

        let increment = outer();
        increment(); // 1
        increment(); // 2
Implementation Logic:
Even after
outer()is done executing,inner()rememberscounterGreat for data privacy and factory functions
🔹 10. EVENT LISTENERS
addEventListener()methodEvent types:
click,mouseover,keydown, etc.
Example:
        <button id="btn">Click</button>
        <p id="result"></p>

        <script>
          document.getElementById("btn").addEventListener("click", function () {
            document.getElementById("result").innerText = "Button was clicked!";
          });
        </script>
Implementation Logic:
Event listeners wait for a user action
Can attach multiple listeners to the same element
Promotes separation of JS and HTML code
🔹 Why ES6+ Matters
Cleaner syntax → less boilerplate
Better scoping with
let&constModern web apps use modules, promises, async/await
Easier array & object manipulation
✅ Mini Project Ideas (Hands-on)
| Project | Concepts Used |
| To-Do App | DOM, Events, Arrays, LocalStorage (Optional) |
| Weather App | Fetch API, Async/Await, DOM |
| Quiz App | Event Listeners, Functions, DOM, Array Methods |
| Clock App | setInterval, DOM, Functions |
| GitHub Profile Fetcher | Fetch API, DOM, Async/Await |
React.js

📌 What is React.js?
React.js is a JavaScript library for building user interfaces, especially dynamic and interactive web applications.
Created by Facebook
Focused on Component-Based Architecture
Uses Virtual DOM for fast rendering
Why Use React?
Component-based & reusable
Efficient updates with Virtual DOM
Declarative UI → easier to read
Large ecosystem & communityIdeal for Single Page Applications (SPA)React.js Quick Setup GuideStep 1: Install Node.js
Start by installing the Node.js installer for Windows. Click here to visit the official Node.js website and download the LTS version (recommended). Once the installer is downloaded, run it, and follow the prompts, ensuring you don’t change any default settings. Click “Next” until the installation completes.

Also Read: Build a Search Component in React [just in 3 simple steps]
Step 2: Verify the Installation
To ensure Node.js has been installed correctly, open the command prompt and type:
node -v
If the installation is successful, the terminal will display the installed version of Node.js.

Also Read: How to Render an Array of Objects in React? [in 3 easy steps]
Step 3: Install Create React App
Next, in the terminal, run the following command:
npm install -g create-react-app
This command will globally install the Create React App tool. To verify the installation, type:
create-react-app –version
If installed correctly, it will display the installed version of create react app.

Also Read: Use ReactJS to Fetch and Display Data from API – 5 Simple Steps
Step 4: Create a New Folder for Your React App
Create a new folder for your React app by running:
mkdir newfolder
Replace “newfolder” with your desired folder name. Move inside the folder using:
cd newfolder

Also Read: Top ReactJS Interview Questions and Answers Of 2024! [Part-1]
Step 5: Create a New React App
Inside the newly created folder, run the command:
create-react-app your_app_name
This will take some time as it installs the required dependencies. Note: Due to npm naming restrictions, the app name should only contain lowercase letters.

Also Read: useState() Hook in React for Beginners | React Hooks 2024
Step 6: Open Your Project in an IDE
Open your preferred IDE (e.g., Visual Studio Code) and navigate to the folder where your React app was installed. Enter the directory using:
cd your_app_name

Also Read: 6 Essential Prerequisites For Learning ReactJS
Step 7: Start Your App
To start your app, run the following command:
npm start

This command will open a new tab in your browser, displaying the React logo. Congratulations! You have successfully installed a React app and are ready to start building amazing web applications.

1.1 Components
Components are reusable UI blocks.
Functional Components → Functions returning JSX
Class Components → ES6 classes extending
React.Component
    // Functional Component
    function Greeting({ name }) {
      return <h1>Hello, {name}!</h1>;
    }

    // Class Component
    class Greeting extends React.Component {
      render() {
        return <h1>Hello, {this.props.name}!</h1>;
      }
    }
1.2 JSX
JSX = JavaScript + XML-like syntax
Makes UI code readable & declarative
const element = <h1>Hello, World!</h1>;
1.3 Props
Props = inputs to components
Read-only, passed from parent to child
    function Welcome(props) {
      return <h1>Hello, {props.name}</h1>;
    }
1.4 State
State = local, mutable data inside a component
Use
useStatehook in functional components
    import { useState } from 'react';

    function Counter() {
      const [count, setCount] = useState(0);

      return (
        <>
          <p>Count: {count}</p>
          <button onClick={() => setCount(count + 1)}>Increment</button>
        </>
      );
    }
1.5 Event Handling
<button onClick={() => alert("Clicked!")}>Click Me</button>
- Similar to HTML events, but camelCase syntax is used
🔹 2. Advanced Concepts
2.1 Lifecycle Methods (Class Components)
Mounting:
constructor,componentDidMountUpdating:
componentDidUpdateUnmounting:
componentWillUnmount
    class Clock extends React.Component {
      componentDidMount() { console.log("Mounted"); }
      componentWillUnmount() { console.log("Unmounted"); }
    }
2.2 Hooks (Functional Components)
useState → Local state
useEffect → Side-effects (API calls, timers)
useRef → Reference DOM elements
useContext → Share state globally
    import { useEffect, useState } from 'react';

    function Timer() {
      const [seconds, setSeconds] = useState(0);

      useEffect(() => {
        const interval = setInterval(() => setSeconds(s => s + 1), 1000);
        return () => clearInterval(interval); // cleanup
      }, []);

      return <p>Time: {seconds}s</p>;
    }
2.3 Conditional Rendering
    function User({ isLoggedIn }) {
      return isLoggedIn ? <h1>Welcome Back!</h1> : <h1>Please Login</h1>;
    }
Key Points:
Used to render different UI based on conditions.
Helps build dynamic interfaces like login/logout screens.
Can use ternary
? :, logical&&, or separate functions for complex conditions.
2.4 Lists & Keys
    const fruits = ['Apple','Banana','Mango'];

    <ul>
      {fruits.map((fruit, index) => (
        <li key={index}>{fruit}</li>
      ))}
    </ul>
Key Points:
Render arrays/lists dynamically.
keyis essential for React to track items efficiently, avoid unnecessary re-renders.Helps with performance optimization and proper DOM updates.
Key helps React track items efficiently
2.5 Forms & Controlled Components
    function Form() {
      const [name, setName] = useState("");

      return (
        <form>
          <input value={name} onChange={e => setName(e.target.value)} />
          <p>Name: {name}</p>
        </form>
      );
    }
Key Points:
Forms are controlled by React state.
Makes form data management easier.
Supports real-time validation and dynamic input handling.
2.6 Context API
- Global state without prop drilling
    import { createContext, useContext } from 'react';

    const ThemeContext = createContext("light");

    function App() {
      return (
        <ThemeContext.Provider value="dark">
          <Toolbar />
        </ThemeContext.Provider>
      );
    }

    function Toolbar() {
      const theme = useContext(ThemeContext);
      return <p>Theme: {theme}</p>;
    }
Key Points:
Used for global state sharing without prop drilling.
Perfect for themes, authentication status, or language settings.
createContext+useContext= simple and efficient
2.7 React Router (SPA Navigation)
    import { BrowserRouter as Router, Routes, Route, Link } from 'react-router-dom';

    function App() {
      return (
        <Router>
          <nav>
            <Link to="/">Home</Link>
            <Link to="/about">About</Link>
          </nav>
          <Routes>
            <Route path="/" element={<Home />} />
            <Route path="/about" element={<About />} />
          </Routes>
        </Router>
      );
    }
Key Points:
Enables Single Page Applications (SPA).
Client-side routing, no full page reload.
Linkreplaces<a>for smooth navigation.
2.8 Higher-Order Components (HOC)
Functions that take a component and return a new component
Used for code reuse and logic abstraction
    function withLogger(Component) {
      return function(props) {
        console.log("Props:", props);
        return <Component {...props} />;
      };
    }
Key Points:
Functions that enhance components with additional functionality.
Promotes code reuse and logic abstraction.
Example: logging, authentication checks, theming.
2.9 React Performance Optimization
Memoization:
React.memofor components,useMemofor valuesCode Splitting:
React.lazy+SuspenseAvoid unnecessary re-renders with proper keys
🔹 3. React + JS Workflow
    [HTML] + [CSS] → JSX Components
            |
            v
    [State / Props / Events] → UI Logic
            |
            v
    [Virtual DOM] → Efficient DOM Updates
            |
            v
    [Browser DOM] → Rendered Web Page
Key Points:
JSX = bridge between HTML/CSS and JavaScript logic
Virtual DOM = faster updates than direct DOM manipulation
React keeps UI & logic modular and efficient
🔹 Mini Projects Ideas
| Project | Concepts Used | Key Learning |
| To-Do App | useState, Events, Arrays | State management, DOM updates |
| Weather App | Fetch API, Async/Await, useEffect | API handling, async data rendering |
| Quiz App | Conditional Rendering, Array Methods | Logic flow, dynamic rendering |
| Clock App | setInterval, useEffect | Timers, React lifecycle |
| GitHub Profile Fetcher | Fetch API, useEffect, State | API integration, async handling |
Git & GitHub – Quick Guide

1. What is Git?
Git = Distributed version control system (VCS)
Tracks changes in code/files
Enables collaboration among developers
Works locally
2. What is GitHub?
GitHub = Cloud platform for Git repositories
Store, share, and collaborate on projects
Supports pull requests, issues, branches, CI/CD
3. Git Installation & Setup
Step 1: Install Git
Windows: Download Git → Install with default options → Includes Git Bash
Mac:
brew install git # Using Homebrew
- Linux:
sudo apt update
sudo apt install git
Step 2: Git Setup
git config --global user.name "Your Name"
git config --global user.email "your.email@example.com"
git config --list   # Verify settings
Step 3: Git Bash (Windows)
Provides a UNIX-like terminal
Run commands like Linux/macOS terminal
Shortcut: Right-click → “Git Bash Here”

4. Basic Git Workflow
Initialize Repository
git init         # Initialize Git in folder
git clone <repo> # Clone remote repo
Check Status & History
git status       # Show changes & staged files
git log          # View commit history
Add & Commit
git add <file>      # Stage a file
git add .           # Stage all files
git commit -m "Message"  # Save changes
Push & Pull
git push origin main    # Upload commits to GitHub
git pull origin main    # Fetch & merge remote changes
5. Branching & Merging
git branch           # List branches
git branch <name>    # Create branch
git checkout <name>  # Switch branch
git merge <branch>   # Merge branch into current
✅ Branching = feature isolation
6. Undo & Reset
git checkout -- <file>       # Undo local changes
git reset HEAD <file>        # Unstage file
git revert <commit>          # Undo commit safely
git reset --hard <commit>    # Reset to specific commit (caution!)
7. Stashing
git stash           # Save changes temporarily
git stash apply     # Restore stashed changes
git stash drop      # Delete stash
✅ Useful for switching branches without committing unfinished work
8. Remote Repositories
git remote add origin <url>  # Link local repo to GitHub
git remote -v                # View remote URLs
git fetch origin             # Fetch latest commits (without merge)
git pull                     # Fetch + merge
git push                     # Push commits
9. GitHub Features
Fork → Copy repo to your account
Pull Request (PR) → Propose changes
Issues → Track bugs/tasks
Actions → Automate workflows (CI/CD)
10. Common Git Shortcuts
| Command | Description |
git diff | Show unstaged changes |
git show <commit> | Show commit details |
git log --oneline --graph --all | Visual commit history |
git tag <name> | Create version tag |
git cherry-pick <commit> | Apply commit from another branch |
11. Best Practices
Commit frequently with meaningful messages
Use branches for new features or fixes
Pull latest changes before pushing
Ignore sensitive files using
.gitignore
12. Sample Git Workflow
# Create feature branch
git checkout -b feature-login

# Make changes
git add .
git commit -m "Add login form"

# Push branch to GitHub
git push origin feature-login

# Create Pull Request on GitHub
Backend Development

Imagine for a moment that you’re ordering your favorite dish from your favorite place through an online food delivery service. You’ve just placed an order through their sleek, user-friendly interface.
This simple action kicks off a series of events behind the scenes: verifying your payment, updating inventory, and sending the order to the restaurant, the delivery partner gets notified about this and after a few minutes, voila, the food will be in your hands. This unseen process, ensuring your food is ordered just right, is possible because of backend development.

1️⃣ What is Backend?
Server-side part of an application
Handles business logic, APIs, database operations, authentication
Node.js = Popular runtime for building fast, scalable backend with JavaScript
Roles and Responsibilities Involved in Backend Development :-
1.1. Developing and Managing APIs
2. Database Management.
3. Server-Side Logic.
4. Integration
⚡ Features of Node.js
Asynchronous & Event-Driven → Non-blocking I/O operations.
Single-threaded but uses an event loop to handle multiple requests efficiently.
Fast Execution → Powered by the V8 engine.
Cross-platform → Works on Windows, Mac, Linux.
NPM (Node Package Manager) → Largest ecosystem of open-source libraries.
Scalable → Perfect for real-time apps (chat apps, gaming, live streaming).
🛠 Installation & Setup
1. Install Node.js
Download from 👉 https://nodejs.org
Choose LTS (Long Term Support) version.
2. Verify Installation
    node -v    # check Node.js version
    npm -v     # check NPM version
3. Initialize a Project
    mkdir myapp
    cd myapp
    npm init -y    # creates package.json
📦 Modules in Node.js
Modules = Reusable blocks of code.
Types:
Built-in Modules (fs, http, os, path, events).
Local Modules (your own JS files).
Third-party Modules (installed via NPM).
Example: Built-in fs Module
    const fs = require('fs');

    // Write to a file
    fs.writeFileSync('hello.txt', 'Hello Node.js');

    // Read from a file
    const data = fs.readFileSync('hello.txt', 'utf8');
    console.log(data);
🌍 Creating a Simple HTTP Server
Node.js allows building servers without external frameworks.
    const http = require('http');

    const server = http.createServer((req, res) => {
      res.writeHead(200, { 'Content-Type': 'text/plain' });
      res.end('Hello, Node.js Server!');
    });

    server.listen(3000, () => {
      console.log('Server running at http://localhost:3000');
    });
👉 Run:
node server.js
⚙️ Event Loop & Asynchronous Nature
Node.js handles requests asynchronously.
Example with setTimeout:
    console.log("Start");

    setTimeout(() => {
      console.log("Inside Timeout");
    }, 2000);

    console.log("End");
👉 Output order:
    Start
    End
    Inside Timeout
🗂 File System (fs) Module Example
    const fs = require('fs');

    // Asynchronous read
    fs.readFile('hello.txt', 'utf8', (err, data) => {
      if (err) throw err;
      console.log(data);
    });
📡 NPM (Node Package Manager)
- Used to install 3rd party libraries.
Example: Install nodemon
npm install -g nodemon
👉 Runs server automatically after changes.
nodemon server.js
🔌 Creating a REST API with Node.js (No Express)
    const http = require('http');
    const url = require('url');

    const server = http.createServer((req, res) => {
      const parsedUrl = url.parse(req.url, true);

      if (parsedUrl.pathname === '/api' && req.method === 'GET') {
        res.writeHead(200, { 'Content-Type': 'application/json' });
        res.end(JSON.stringify({ message: "Hello API" }));
      } else {
        res.writeHead(404, { 'Content-Type': 'text/plain' });
        res.end('Not Found');
      }
    });

    server.listen(4000, () => {
      console.log("API running at http://localhost:4000");
    });
🔄 Difference Between Node.js & Traditional Servers (PHP, Java, etc.)
| Feature | Node.js 🚀 | Traditional Servers (PHP, Java) |
| Execution Model | Single-threaded, event-driven | Multi-threaded |
| Speed | Very fast (V8 engine) | Comparatively slower |
| Scalability | High (non-blocking) | Limited due to threads |
| Language | JavaScript | PHP, Java, etc. |
| Real-time Apps | Excellent | Average |
📊 Diagram: Node.js Workflow
          Client Request
               ↓
        ┌────────────────┐
        │   Event Loop   │
        └────────────────┘
               ↓
     ┌───────────────────────┐
     │ Non-blocking I/O Ops  │
     └───────────────────────┘
               ↓
         Response to Client
✅ When to Use Node.js
Real-time applications (Chat, Games).
APIs & Microservices.
Streaming apps.
Scalable backend systems.
MongoDB


Difference Between MongoDB and MySQL
| Feature | MongoDB | MySQL | | --- | --- | --- | | Data Model | Document-oriented (JSON-like BSON) | Relational (tables with rows and columns) | | Schema | Schema-less, flexible | Schema-based, structured | | Scalability | Horizontal scaling (sharding) | Vertical scaling | | Transactions | Supports multi-document ACID transactions (since v4.0) | Supports ACID transactions | | Query Language | MongoDB Query Language (MQL) | Structured Query Language (SQL) | | Data Storage | Stores data in collections of documents | Stores data in tables | | Indexing | Supports various types of indexes | Supports various types of indexes | | Performance | Generally faster for read/write operations in large datasets | Generally reliable and consistent performance | | Use Cases | Best for hierarchical data, real-time analytics, content management | Best for structured data, transactional applications | | Join Operations | Limited support for joins, typically done in application logic | Full support for joins between tables | | Replication | Replica sets for high availability and redundancy | Master-slave replication, Group Replication | | Flexibility | Highly flexible, easily adapts to changing requirements | Less flexible, schema changes require careful planning | | Support for Unstructured Data | Excellent, can store any type of data in a document | Limited, primarily structured data |
Overview of MongoDB
MongoDB is a NoSQL database (non-relational).
Stores data in JSON-like documents instead of rows & tables.
Very flexible → schema-less (no predefined structure needed).
Great for scalable, fast applications.

✅ Key Features:
Document-Oriented → Data stored as BSON (Binary JSON).
Flexible Schema → No need to define structure before inserting data.
Scalable → Handles large datasets.
Indexing → Improves query performance.
Aggregation → Powerful data processing pipeline.

Installation & Setup
🔧 Install MongoDB
Download from https://www.mongodb.com/try/download/community
Install → Add MongoDB to system PATH.
Install MongoDB Compass (GUI tool).
🔧 Install via npm (for Node.js project)
npm install mongodb
🔧 Start MongoDB (in Git Bash / CMD)
mongod
(Default runs on mongodb://localhost:27017)
3. Basic MongoDB Commands
👉 Database Commands
    show dbs             # Show all databases
    use mydb             # Create/use a database
    db                   # Show current database
👉 Collection Commands
    db.createCollection("users")   # Create collection
    show collections               # List collections
    db.users.drop()                # Drop collection
👉 CRUD Operations
    # Insert
    db.users.insertOne({name: "Keshav", age: 22})
    db.users.insertMany([{name:"John"}, {name:"Alice"}])

    # Read
    db.users.find()                     # Show all
    db.users.find({age: 22})            # Filter

    # Update
    db.users.updateOne({name: "Keshav"}, {$set: {age: 23}})
    db.users.updateMany({}, {$set: {active: true}})

    # Delete
    db.users.deleteOne({name: "John"})
    db.users.deleteMany({active: false})

4. MongoDB with Node.js Example
📂 Project Setup
    mkdir mongodb-demo
    cd mongodb-demo
    npm init -y
    npm install mongodb
📜 index.js
    const { MongoClient } = require("mongodb");

    // Connection URL
    const url = "mongodb://127.0.0.1:27017";
    const client = new MongoClient(url);

    // Database Name
    const dbName = "mydb";

    async function main() {
      await client.connect();
      console.log("✅ Connected successfully to MongoDB");

      const db = client.db(dbName);
      const collection = db.collection("users");

      // Insert
      await collection.insertOne({ name: "Keshav", age: 22 });

      // Find
      const users = await collection.find({}).toArray();
      console.log("Users:", users);

      // Update
      await collection.updateOne({ name: "Keshav" }, { $set: { age: 23 } });

      // Delete
      await collection.deleteOne({ name: "John" });

      return "Done!";
    }

    main()
      .then(console.log)
      .catch(console.error)
      .finally(() => client.close());
Run:
node index.js
5. Advanced MongoDB Features
- Indexes
db.users.createIndex({ name: 1 }) // ascending index on name
- Aggregation Pipeline
    db.users.aggregate([
      { $match: { age: { $gte: 18 } } },
      { $group: { _id: "$age", count: { $sum: 1 } } }
    ])
Relationships
Embedded documents (for one-to-one or one-to-few).
References (for one-to-many, many-to-many).
6. Diagram
    Database (mydb)
     └── Collection (users)
           ├── { _id: 1, name: "Keshav", age: 22 }
           ├── { _id: 2, name: "Alice", age: 25 }
           └── { _id: 3, name: "John", age: 30 }

step-by-step,guide to connect Node.js ↔ MongoDB, both for local MongoDB and MongoDB Atlas (cloud)
- Prerequisites
Node.js + npm installed (
node -v,npm -v)MongoDB:
Local server running (default URL:
mongodb://127.0.0.1:27017)OR a MongoDB Atlas cluster (get the connection string from Atlas → “Connect → Drivers”)
1) Project Setup
    mkdir node-mongo-demo
    cd node-mongo-demo
    npm init -y
    npm i express dotenv
    # choose ONE OR BOTH:
    npm i mongodb          # Native driver
    npm i mongoose         # Mongoose ODM (schema-based)
    npm i nodemon -D       # optional: auto-restart in dev
package.json (dev script, optional)
    {
      "scripts": {
        "dev": "nodemon server.js"
      }
    }
2) Environment Variables
Create .env at the project root:
For Local MongoDB:
    MONGODB_URI=mongodb://127.0.0.1:27017/mydb
    PORT=3000
For Atlas (replace placeholders):
    MONGODB_URI=mongodb+srv://<username>:<password>@<clusterName>.xyz.mongodb.net/mydb?retryWrites=true&w=majority
    PORT=3000
Tip (Atlas): In the Atlas UI, add your IP to the allowlist (0.0.0.0/0 for testing) and create a DB user.
3) Folder Structure (suggested)
    node-mongo-demo/
      .env
      server.js
      db/
        mongoClient.js      # native driver (optional)
        mongooseClient.js   # mongoose (optional)
      models/
        User.js             # mongoose model (optional)
      routes/
        users.js            # express routes (optional)
A) Connect using MongoDB Native Driver
4A) Create a reusable client
db/mongoClient.js
    const { MongoClient } = require('mongodb');
    const uri = process.env.MONGODB_URI;

    // Reuse the client across the app
    let client;
    let db;

    async function connectMongo() {
      if (db) return db;                  // already connected
      client = new MongoClient(uri);
      await client.connect();
      db = client.db();                   // uses the DB in the URI (mydb)
      console.log('✅ MongoDB connected (Native Driver)');
      return db;
    }

    // Graceful shutdown
    process.on('SIGINT', async () => {
      if (client) await client.close();
      process.exit(0);
    });

    module.exports = { connectMongo };
5A) Wire it in Express
server.js
    require('dotenv').config();
    const express = require('express');
    const { connectMongo } = require('./db/mongoClient');

    const app = express();
    app.use(express.json());

    // Example routes using native driver
    app.get('/users', async (req, res) => {
      try {
        const db = await connectMongo();
        const users = await db.collection('users').find().toArray();
        res.json(users);
      } catch (e) {
        console.error(e);
        res.status(500).send('Error fetching users');
      }
    });

    app.post('/users', async (req, res) => {
      try {
        const db = await connectMongo();
        const result = await db.collection('users').insertOne(req.body);
        res.json({ insertedId: result.insertedId });
      } catch (e) {
        console.error(e);
        res.status(500).send('Error creating user');
      }
    });

    const PORT = process.env.PORT || 3000;
    app.listen(PORT, () => console.log(`HTTP server on http://localhost:${PORT}`));
6A) Run & Test
    npm run dev    # or: node server.js
    # In another terminal:
    curl http://localhost:3000/users
    curl -X POST http://localhost:3000/users \
      -H "Content-Type: application/json" \
      -d '{"name":"Keshav","email":"keshav@example.com","age":22}'
B) Connect using Mongoose (Recommended for schemas/validation)
4B) Create a Mongoose connector
db/mongooseClient.js
    const mongoose = require('mongoose');
    const uri = process.env.MONGODB_URI;

    async function connectMongoose() {
      // Mongoose uses a global connection; call once at startup
      await mongoose.connect(uri);
      console.log('✅ MongoDB connected (Mongoose)');
    }

    module.exports = { connectMongoose, mongoose };
5B) Define a Model (Schema)
models/User.js
    const { mongoose } = require('../db/mongooseClient');

    const userSchema = new mongoose.Schema(
      {
        name:   { type: String, required: true, trim: true },
        email:  { type: String, required: true, unique: true, lowercase: true },
        age:    { type: Number, min: 0 },
        active: { type: Boolean, default: true }
      },
      { timestamps: true } // createdAt, updatedAt
    );

    module.exports = mongoose.model('User', userSchema);
6B) Express server with Mongoose routes
server.js
    require('dotenv').config();
    const express = require('express');
    const { connectMongoose } = require('./db/mongooseClient');
    const User = require('./models/User');

    const app = express();
    app.use(express.json());

    (async () => {
      await connectMongoose();
    })();

    // CREATE
    app.post('/users', async (req, res) => {
      try {
        const doc = await User.create(req.body);
        res.status(201).json(doc);
      } catch (e) {
        console.error(e);
        res.status(400).json({ error: e.message });
      }
    });

    // READ (all)
    app.get('/users', async (req, res) => {
      const users = await User.find().lean();
      res.json(users);
    });

    // READ (one)
    app.get('/users/:id', async (req, res) => {
      const user = await User.findById(req.params.id).lean();
      user ? res.json(user) : res.status(404).send('Not found');
    });

    // UPDATE
    app.put('/users/:id', async (req, res) => {
      try {
        const updated = await User.findByIdAndUpdate(
          req.params.id,
          req.body,
          { new: true, runValidators: true }
        ).lean();
        updated ? res.json(updated) : res.status(404).send('Not found');
      } catch (e) {
        console.error(e);
        res.status(400).json({ error: e.message });
      }
    });

    // DELETE
    app.delete('/users/:id', async (req, res) => {
      const result = await User.findByIdAndDelete(req.params.id).lean();
      result ? res.json({ deleted: true }) : res.status(404).send('Not found');
    });

    const PORT = process.env.PORT || 3000;
    app.listen(PORT, () => console.log(`HTTP server on http://localhost:${PORT}`));
7B) Run & Test
    npm run dev    # or: node server.js
    # Create:
    curl -X POST http://localhost:3000/users \
      -H "Content-Type: application/json" \
      -d '{"name":"Keshav","email":"keshav@example.com","age":22}'
    # List:
    curl http://localhost:3000/users
C) Common Pitfalls & Fixes
Atlas auth errors: Ensure DB user is created and IP allowlist includes your IP (or
0.0.0.0/0for testing).Wrong DB name: If your URI doesn’t include
/mydb,mongoose.connect(uri)will use the default DB; include a DB name.Connection reuse: With native driver, reuse a single
MongoClient. With Mongoose, connect once at startup.Validation: Prefer Mongoose if you need schemas, validation, middleware (pre/post hooks).
Graceful shutdown: Close connections on
SIGINT(Ctrl+C) to avoid hangs.Time zones: Use ISO dates; store UTC; format on presentation.
Express.js

🔹 What is Express.js?
Express.js is a minimal and flexible Node.js web framework.
Helps in building APIs and web applications quickly.
Provides features like routing, middleware, error handling.
Express is widely used in backend development with Node.js.
🔹 Why use Express.js?
✅ Simplifies server creation in Node.js
✅ Built-in routing system
✅ Middleware support (request/response handling)
✅ Works great with MongoDB, MySQL, PostgreSQL
✅ Large community & ecosystem
🔹 Install & Setup
1. Install Node.js (already covered in Node.js notes).
Verify:
    node -v
    npm -v
2. Create Project & Install Express
    mkdir express-app
    cd express-app
    npm init -y
    npm install express
3. Run Project
node index.js
🔹 Hello World in Express
📄 index.js
    const express = require("express");
    const app = express();

    // Default Route
    app.get("/", (req, res) => {
      res.send("Hello World from Express.js 🚀");
    });

    // Server listening
    app.listen(3000, () => {
      console.log("Server running on http://localhost:3000");
    });
👉 Run:
node index.js
Open in browser → http://localhost:3000
🔹 Express.js Features
1. Routing
    // GET request
    app.get("/about", (req, res) => {
      res.send("About Page");
    });

    // POST request
    app.post("/submit", (req, res) => {
      res.send("Form Submitted");
    });

    // Dynamic Routing
    app.get("/user/:id", (req, res) => {
      res.send(`User ID: ${req.params.id}`);
    });
2. Middleware
Middleware = functions that execute before route handling.
    // Custom Middleware
    app.use((req, res, next) => {
      console.log(`Request URL: ${req.url} - Method: ${req.method}`);
      next(); // move to next handler
    });

    app.get("/", (req, res) => {
      res.send("Middleware Example ✅");
    });
3. Serving Static Files
app.use(express.static("public"));
👉 Create a public/ folder and put index.html inside.
Open → http://localhost:3000/index.html
4. Handling JSON & Forms
    app.use(express.json()); // for JSON data
    app.use(express.urlencoded({ extended: true })); // for forms

    app.post("/data", (req, res) => {
      console.log(req.body);
      res.send("Data Received ✅");
    });
5. Error Handling
    // Normal Route
    app.get("/", (req, res) => {
      throw new Error("Something went wrong ❌");
    });

    // Error Middleware
    app.use((err, req, res, next) => {
      res.status(500).send({ error: err.message });
    });
6. CRUD Example with In-Memory Array
📄 index.js
    const express = require("express");
    const app = express();
    app.use(express.json());

    let users = [];

    // CREATE
    app.post("/users", (req, res) => {
      users.push(req.body);
      res.send("User Added ✅");
    });

    // READ
    app.get("/users", (req, res) => {
      res.json(users);
    });

    // UPDATE
    app.put("/users/:id", (req, res) => {
      const id = req.params.id;
      users[id] = req.body;
      res.send("User Updated ✅");
    });

    // DELETE
    app.delete("/users/:id", (req, res) => {
      const id = req.params.id;
      users.splice(id, 1);
      res.send("User Deleted ✅");
    });

    app.listen(3000, () => console.log("Server running on http://localhost:3000"));
🔹 Express + MongoDB (Simple Example)
📄 index.js
    const express = require("express");
    const mongoose = require("mongoose");

    const app = express();
    app.use(express.json());

    // MongoDB connection
    mongoose.connect("mongodb://127.0.0.1:27017/expressdb")
      .then(() => console.log("✅ MongoDB Connected"))
      .catch(err => console.error(err));

    // Schema
    const UserSchema = new mongoose.Schema({
      name: String,
      email: String
    });
    const User = mongoose.model("User", UserSchema);

    // Routes
    app.post("/users", async (req, res) => {
      const user = new User(req.body);
      await user.save();
      res.send("User Saved to DB ✅");
    });

    app.get("/users", async (req, res) => {
      const users = await User.find();
      res.json(users);
    });

    app.listen(3000, () => console.log("Server running at http://localhost:3000"));
🔹 Express.js Best Practices
✔ Use dotenv for environment variables
✔ Organize code into routes, controllers, models
✔ Always handle errors properly
✔ Use middlewares for authentication & logging
✔ Use nodemon for auto-restart
    npm install -g nodemon
    nodemon index.js
Projects CoveredTaskify – A full-stack Task Manager (CRUD with authentication, deadlines, and status tracking).
ShopSphere – E-Commerce Platform (product listing, cart, orders, payments).
BlogNest – Blogging Platform (Markdown editor, comments, likes, tags).
ChatHive – Real-time Chat App (WebSockets/Socket.io, group & private chat).
Learnify – Online Course Platform (users enroll, video lessons, progress tracking).
EventHub – Event Management System (create, register, manage events).
FitTrackr – Fitness Tracker (daily logs, goals, analytics dashboard).
Foodiez – Online Food Ordering App (menu, cart, order tracking, delivery status).
DevConnect – Social Media for Developers (profiles, posts, follow system).
Vaultify – Secure Notes App (authentication, encrypted notes, categories).
✨ "Hope you’re enjoying this journey of learning! Keep building, keep growing, and always aim for greatness 🚀. Follow me for more blogs, projects, and tech insights — let’s achieve together!"
Follow me - https://hashnode.com/@keshavBlog


